Sunday, August 23, 2015

A New Kind Making

3D printable plastic designs definitely have their place, but nothing beats fusing metal by way of super-heated metal. There's something violently entertaining about arc welding.  The smoke, the sparks, the danger.

It's very much like firing a gun.  Only difference is that you're making things, and not destroying them with supersonic bits of lead and copper.

Introducing the new tool in the MakerJeff toolbox, the Lincoln Handy Mig welder!


The feed mechanism is very much like a filament extruder.


I'll be using flux-core wire until I can get a gas setup going.  The go-to flux core wire that most people tend to use is the Lincoln Electric NR-211-MP.  Again, very reminiscent of a spool plastic filament.


Also brushing up on Solidworks, digging deeper into the Weldments and FEA simulations.


I've got a few fun projects lined up to test what this welder can do, so stay tuned!

Friday, July 31, 2015

TANK3 Preview!

Here's a preview of a tread-based robot that I've been working on.  More details of the build to come!


Sunday, February 1, 2015

Project-Making-Of: Ms. Yang's "Bully" Horn

As part of her job as a 2nd grade teacher, my fiancee has traffic duty every day after school.  In order to save parents and children from themselves, she's forced to strain her voice with commands that really should be common sense.

Something had to be done.

Introducing Ms. Yang's "Bully Horn".

Original Photoshop concept paintover.

Based off of a Pyle PMP30 Professional Megaphone,  the "Bully Horn" needed a little bit of style. We decided on a pink glitter paint scheme, with rhinestone trim around the edges and her name.

After 3 coats of pink glitter paint and 3 coats of clear.

After disassembling the megaphone and masking off non-paint areas, I whipped out the DIY spraybooth and applied 3 coats of glitter paint and 3 coats of clearcoat.

Semi-sealing the gaps before wet-sanding.

It's not a 100% seal, but I used painters tape to help keep the water out of the battery compartment. 

Wet sanding in the bathroom sink.

 The "Bully Horn" was wet-sanded with 1000 then 2000 grit sand paper.  Special care had to be taken for undercuts and hard angles.

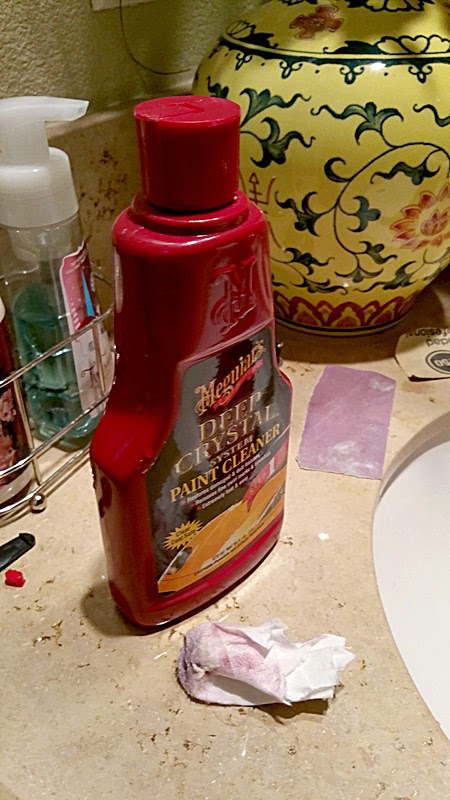
Meguiar's Paint Cleaner.

After the wet sanding, I used left-over Meguiar's Paint Cleaner to polish and clean up the micro-scratches left by the 2000 grit paper.

Reassembly of glittery-shiny "Bully Horn".

The "Bully Horn" was then reassembled to check for gaps in the paint, especially around the hinge area.  There was a bit of white still showing, so I touched it up using a nail polish brush.

Vinyl decals applied.

The decal was designed in Adobe Illustrator and cut using a Silhouette Cameo 2 personal plotter (that we named Cutter-Bot).

Rhinestones around the vinyl decal.

The Silhouette Cameo 2 also came with a wonderful software that could create rhinestone templates.  Great for aligning rhinestones to vinyl decals cut from the same machine.  For the stencil, I used a matte black removable vinyl that you can see in the background. 

Individually hand-placed rhinestones.

Each rhinestone was hand-placed and glued on using Gorilla Super Glue.  I found the quickest method of application was to create a small pool of glue to dip the rhinestone in, then immediately place it where it needs to go.

Happy fiancee with 30 watts of vocal power.

After 2 months on and off manual labor (most of which went to hand-placing the rhinestones), this 2nd grade teacher is now armed with 30 watts of voice amplification power.  All for the purpose of keeping children (and their grown up versions) safe from themselves, of course.

Wednesday, January 14, 2015

3D Printing: E-Bike Miniature Frame Joints

I miniaturized the joint design to build a straw mockup of the frame.  Nothing beats the touchy-feely aspect of a physical mockup!


Being able to hold it in my hands gave me a new direction on the front-end design of the frame.  The new design moves the lower connection to the fork tube closer to the wheel.

Also, received my order of XTC-3D brush-on coating for 3D printed parts.  It's supposed to self-level as it cures so it should cut down finishing time by quite a bit.  I'll do some tests this weekend and report back what I find.


Tuesday, January 13, 2015

3D Printing: E-Bike Frame Joint

I'm using these joints to build the PVC frame of the E-Bike. They'll most likely be solid urethane resin casts for a couple of reasons.

The primary reason being that these joints take about 4-5 hours to print with a 50% infill.  An OOMOO 30 silicon mold would require roughly 6 hours to cure, but each Smoothcast 320 resin part has a demold time of only 10 minutes.

I need about 16 of these.

Another reason is that the cast joints would be solid and therefore stronger.  ABS has stronger material properties than Smoothcast 320, but the nature of the FDM (FFF) process makes the part prone to delamination under stress.

Here's a quick comparison between the two materials:

  • Smoothcast 320:  (datasheet)
    • Tensil strength: 3,000 psi
    • Compression strength: 3,650 psi
  • ABS: (datasheet)
    • Tensil strength: 5,532 max psi (based on Makerbot filament)
    • Compression strength: 7100 max psi (based on Makerbot filament)
As you can guess from the pictures below, I now split tricky parts in half when printing.  They're merged either with ABS glue, super glue, or JB Kwik Weld.

I used to split the parts directly in Solidworks, but for 2015, I'm trying to ween off commercial software and rely on open source tools wherever I can.  

This part was:
The toolchain becomes much longer when going the open source route.  However, with the exception of the 3D printer itself, everything is free and available for Windows, OSX, and Linux.  More to come!


Saturday, January 10, 2015

3d Printing: Plastic Thrust Bearing

As a personal challenge for 2015,  I'm trying to ween myself off of commercial software and focus on using open source software.  This was modeled in FreeCAD, a wonderful open source parametric modeler available for Windows, OSX, and Linux.

This is a test for a thrust bearing design as part of a work-in-progress all-plastic electric bike.


3D Printing: Heat Shields for Larger Prints

Not 100% sure where I read it first, but the idea of using a heat shield (technically a "draft" shield) really does work! Usually on my Replicator, a part that spans across the entire build platform will curl up on both ends.

However, using a 0.8mm thick heat shield (single 0.4mm shell all around), this client part came out perfectly straight. Also helped with the start and stop filament gapping that occurs with accelerated printing.